Después de unos meses peleandome con el kit de Trumpeter, finalmente lo he terminado sin volverme loco. Añadí dos sets de fotograbados de Eduard y unas cadenas "workables" de Bronco para completar el modelo. Aquí podréis encontrar como empezó este proyecto, y con un poco de paciencia, como terminara. Empecemos!

**Disclaimer! Important, none of the content of this blog is real. All of the pictures shown come from artistic models or replicas. The contents of this blog are for artistic and educational purposes only.**
Idea
I had the whole idea of a massive tank rolling by a mound looking into the Chieftain tank. I just came across with this picture, and I started thinking about how cool were to see one of these monsters rolling with their suspensions dancing up and down.


Como he mencionado anteriormente, el montaje esta lleno de encajes horribles, especialmente en la torreta. Putty y lija son vuestros aliados. Quite algunos de los fenders tratando de dar más interés al modelo, así que tuve que rehacer toda la parte que queda escondida debajo de ellos. También quite uno de los barriles y hice trapos y toldos con masilla epoxy de Tamiya.
Tened en cuenta que algunos detalles faltavan cuando tire las fotos.


Tuve la idea de hacer un carro enorme rodando por un montículo investigando sobre el Chieftain. Simplemente me encontré con esta foto y empecé a pensar como de espectacular sería ver uno de estos monstruos rodando con sus suspensiones bailando hacia arriba y abajo.
I changed the model from a Chieftain to a Challenger I and then to a Challenger II. That happened after seeing lots of pictures of the Challenger II in Bosnia and Kosovo. Specially those camouflaged with barracuda nets, moss and branches.
Cambié el modelo de un Chieftain a un Challenger I, y después a un Challenger II. Esto ocurrió después de ver muchas fotos de Challenger II en Bosnia y Kosovo. Especialmente esos camuflados con redes de camuflaje barracuda, musgo y ramas.
The kit (El kit)
Even with the reviews available, I didn't realise how much work it was coming until I opened the box. If you think in doing this kit, you better prepare yourself. You will find ejector marks in almost every little piece. That is not an exaggeration, but don't worry, you will find plenty of surprises along the assembly. Starting from serious gaps to insane fittings.
I used two different sets from Eduard to complement the kit. The "Challenger II MBT /Kfor 1/35" Cat.no 46733 and the Zoom Set "Challenger II MBT /Kfor 1/35" Cat.no TP070. From the TP070 set I only used the grills, because the ones from the 46733 were incorrect. Finally, I added a workable tracks set from Bronco. Three piece links, mould marks and lots of work.
I used two different sets from Eduard to complement the kit. The "Challenger II MBT /Kfor 1/35" Cat.no 46733 and the Zoom Set "Challenger II MBT /Kfor 1/35" Cat.no TP070. From the TP070 set I only used the grills, because the ones from the 46733 were incorrect. Finally, I added a workable tracks set from Bronco. Three piece links, mould marks and lots of work.
Incluso con las revisiones disponibles, solo me di cuenta de la cantidad de trabajo que se avecinaba hasta que abrí la caja. Si estáis pensado en hacer este kit, mejor preparaos. Encontrareis marcas de eyector casi en cada pequeña pieza del kit. Pero tranquilos, os encontrareis multitud de sorpresas durante el proceso de montaje. Empezando por agujeros realmente importantes a encajes imposibles.
Utilice dos sets diferentes de Eduard para complementar el kit. El "Challenger II MBT/Kfor 1/35" Cat.no 46733 y el Zoom Set " Challenger II MBT /Kfor 1/35" Cat.no TP070. Del set TP070 solo utilice las rejillas, ya que las que vienen con el set 46733 eran incorrectas. Finalmente añadí un set de cadenas "workables" de Bronco. Eslabones de tres piezas, marcas de molde y mucho trabajo.
Utilice dos sets diferentes de Eduard para complementar el kit. El "Challenger II MBT/Kfor 1/35" Cat.no 46733 y el Zoom Set " Challenger II MBT /Kfor 1/35" Cat.no TP070. Del set TP070 solo utilice las rejillas, ya que las que vienen con el set 46733 eran incorrectas. Finalmente añadí un set de cadenas "workables" de Bronco. Eslabones de tres piezas, marcas de molde y mucho trabajo.
The assembly (El montaje)
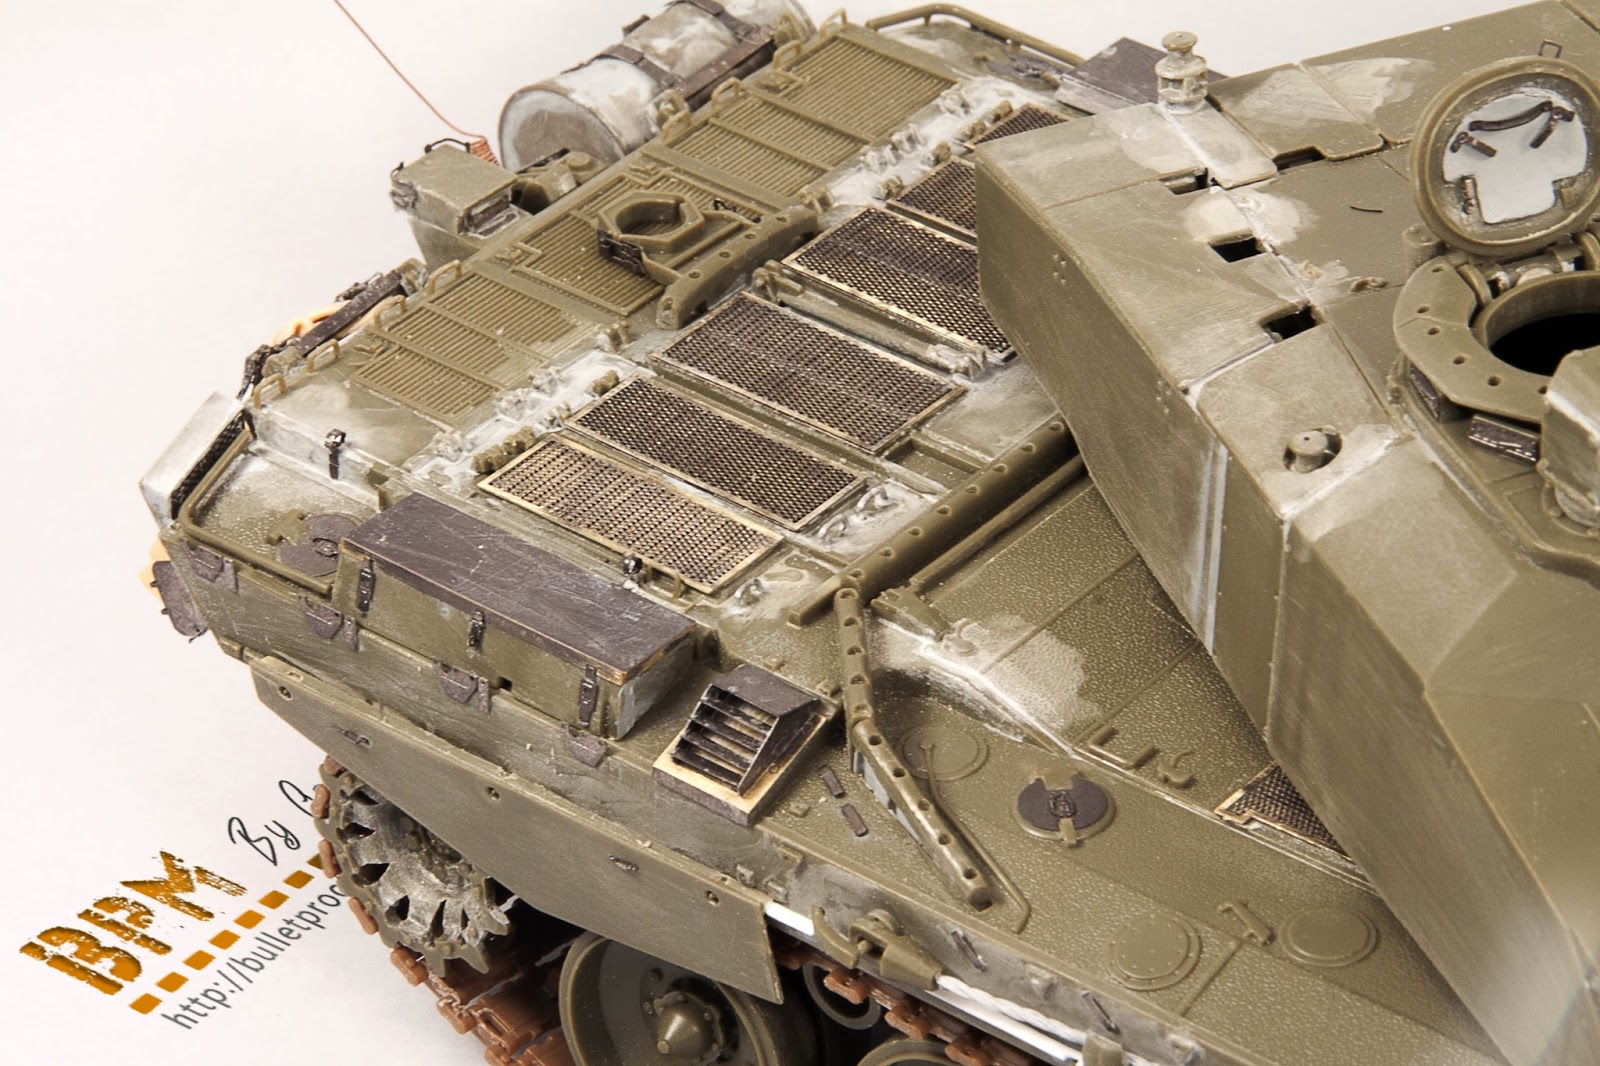
As mentioned, before the assembly is full of nightmare fittings, especially in the turret. Putty and sandpaper are your allied. I removed some of the fenders trying to add interest to the model, so I had to rebuild the part behind them. I also removed one of the barrels and put tarps and canvas made from Tamiya epoxy putty.
Take in account that some details where missing when I took the photos.
Take in account that some details where missing when I took the photos.
Como he mencionado anteriormente, el montaje esta lleno de encajes horribles, especialmente en la torreta. Putty y lija son vuestros aliados. Quite algunos de los fenders tratando de dar más interés al modelo, así que tuve que rehacer toda la parte que queda escondida debajo de ellos. También quite uno de los barriles y hice trapos y toldos con masilla epoxy de Tamiya.
Tened en cuenta que algunos detalles faltavan cuando tire las fotos.
Plastic curgery is needed to acomodate the photoetched parts.
Algo de cirugía es necesaria para acomodar los fotograbados.
The use of soldering allows me to manipulate the pieces without fear of come them apart.
El uso de soldadura nos permite manipular las piezas sin miedo de despegarlas.
The suspensions were adapted to the terrain and glued in this position.
Las suspensiones fuereon adaptadas al terreno y pegadas en esta posición.
The final photos (Las fotos finales)
No comments:
Post a Comment